Last time, we showed you how to wire GSD into an AI assistant on your desktop with our local package. Good news if that felt like too much setup: now there's nothing to set up. If your AI assistant lives in the browser, it can connect to GSD directly — no install, no API keys, nothing pasted anywhere.
You add one URL, log in, and approve. Then you can say "send the gym waiver to Sam" and it happens. Safely. Here's how.
Connect in four clicks
GSD now runs a hosted endpoint at https://gsdhere.com/mcp. It works with MCP-compatible connectors, such as the custom connector feature in claude.ai. There, the steps are:
- Open Settings → Connectors → Add custom connector.
- Paste
https://gsdhere.com/mcp. - Click Connect. You'll land on the GSD login page — sign in like you always do.
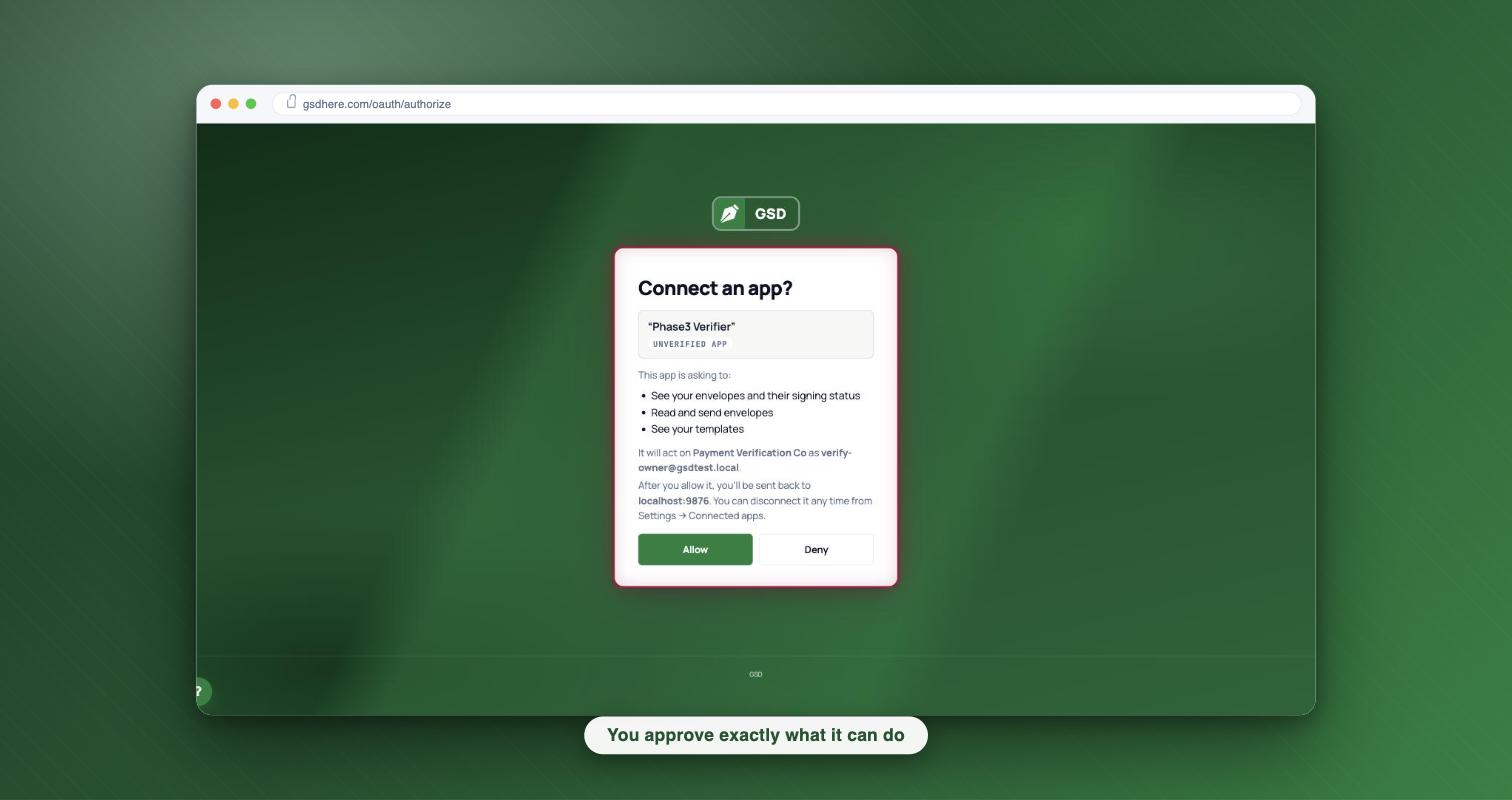
- Read the consent screen and click Allow.
That's it. No key to copy, no key to lose. Your password never touches the assistant — the login happens on gsdhere.com, and the assistant only gets a short-lived token that's automatically refreshed — never your password.
The consent screen is the point
Most connection screens are a wall of legal words. Ours says three things, in plain English:
- Who's asking. The app's name, in quotes, with an "Unverified app" badge. Every third-party connector gets that badge — it's not an insult, it's honesty. The name is chosen by the app, not by us, so we frame it that way.
- What it can do. Not scope codes — words. "Read and send envelopes." "See your templates." If it's not on the list, the app can't do it.
- Which workspace it acts on. Your account and your email, spelled out. No guessing which login you just handed over.
Two buttons: Allow or Deny. Deny and nothing happens at all.
What the conversation looks like
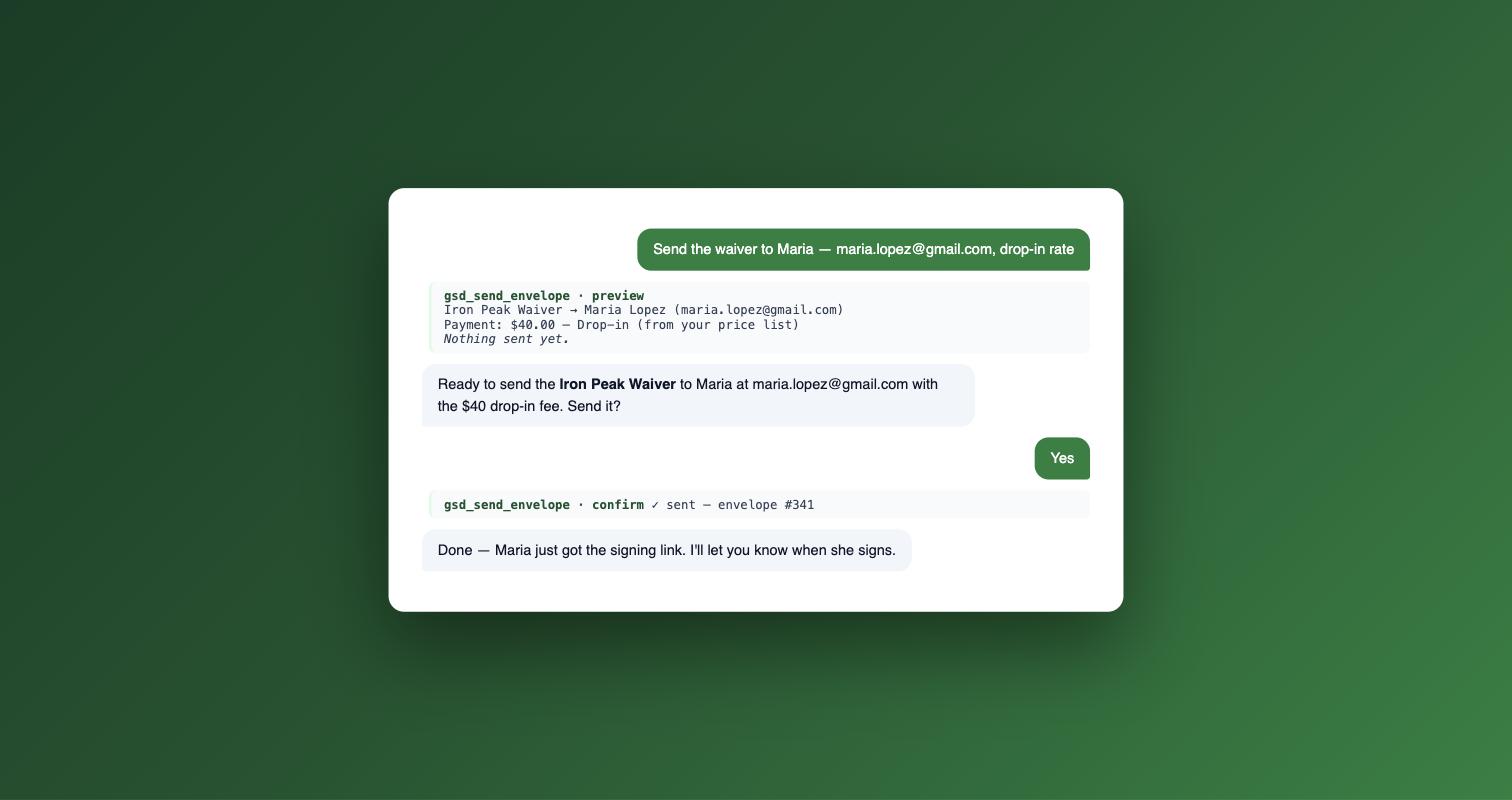
Once connected, your assistant gets five tools: list your templates, send an envelope, check an envelope's status, list envelopes, and a "who am I" check so it always knows which account it's acting on.
Sending is always two steps. Ask for a send and the assistant shows you a preview first — the template, the recipient, the fields. Nothing goes out until you confirm. And prices only come from your template's price list: the AI picks an option you already defined, it can never type an amount. A typo, a hallucination, a weird prompt — none of them can invent a $12 charge or a $12,000 one.
One thing the hosted connection deliberately can't do: download signed documents. Downloads stay local-only, on your machine, where they belong.
You're in control the whole time
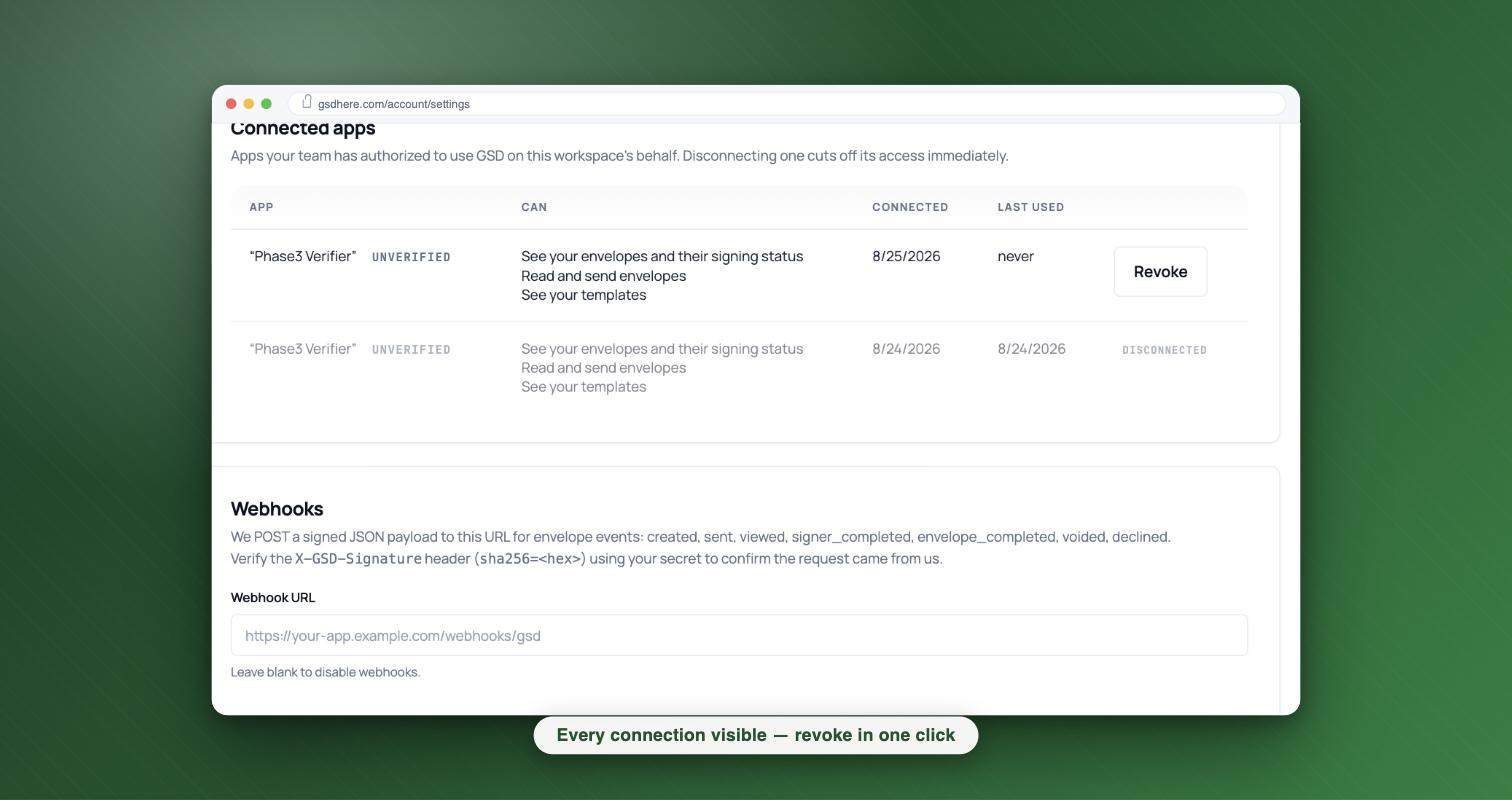
Head to Settings → Connected apps and you'll see every connection you've approved: what it's allowed to do and when it was last used. If anything looks off — or you're just done with it — click Revoke. Access ends instantly. The very next request from that app fails.
And nothing happens off the books. Every envelope sent through a connection is recorded on that envelope's audit trail as "via connected app <name>" — same trail, same standard of proof as everything else in GSD.
Try it
The hosted connector is a Business plan feature. Sends made through it count and bill like any other envelope — no separate meter, no surprises.
If your AI assistant runs on your desktop instead of in the browser, the local package route still works and isn't going anywhere — same tools, same preview-then-confirm rules, plus local downloads. Either way, the docs live at /developers. Add the URL, click Allow, and send your next waiver without leaving the chat.
Ready to get signing done? Start free — 5 documents a month, no credit card — or browse the e-signature guides.